Power BI RLS Implementation & Validation
Audience & Scope
Audience:
- Power BI Developers
- BI Analysts
- Report Owners
Scope: This document explains the implementation and validation of Static and Dynamic Row-Level Security (RLS) in Power BI Desktop and Power BI Service.
What is Row-Level Security (RLS)?
Row-Level Security (RLS) restricts data at the row level so users only see data they are authorized to view.
How RLS works:
- Defined in Power BI Desktop
- Enforced in Power BI Service
- Applied through roles
Prerequisites Before Implementing RLS
Required
- Proper star schema design
- Fact tables connected to dimension tables
- Correct relationships and filter directions
- Clear understanding of access-controlling columns
- Examples:
Region,BusinessUnit,PropertyID
- Examples:
Important
Workspace Admins bypass RLS by default. Always test RLS using Viewer or Member roles.
Types of RLS
- Static RLS → Hard-coded filters
- Dynamic RLS → Filters based on logged-in user
- USERPRINCIPALNAME() – Returns the user's email (recommended for Power BI Service)
- USERNAME() – Not reliable in Service scenarios
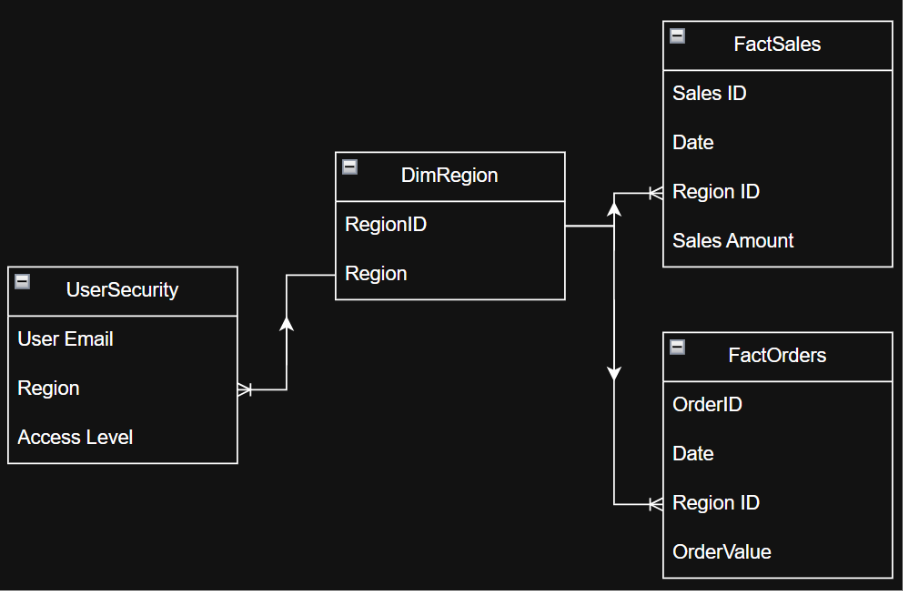
Before implementing RLS, ensure:
Data Model Readiness
- Fact tables are connected to dimension tables
- Relationships are correct (direction matters)
Access Clarity
- Know which column controls access
- Example:
Region,BusinessUnit,PropertyID
- Example:
Static RLS
What is Static RLS?
- Data access rules are hard-coded
- Each role is created manually
- Users assigned to a role always see the same data
Example
- Role A →
Region = East - Role B →
Region = West
Design Decisions
- Which column controls access?
- Where does that column live?
✅ Best Practice
- Use a dimension table column
- Example:
- Table:
DimRegion - Column:
Region
- Table:
- Example:
❌ Avoid
- Using fact table columns for RLS
Steps to Implement Static RLS
1. Open Power BI Desktop
- Go to the Modeling tab
- Click Manage roles

2. Create a New Role
- Click New
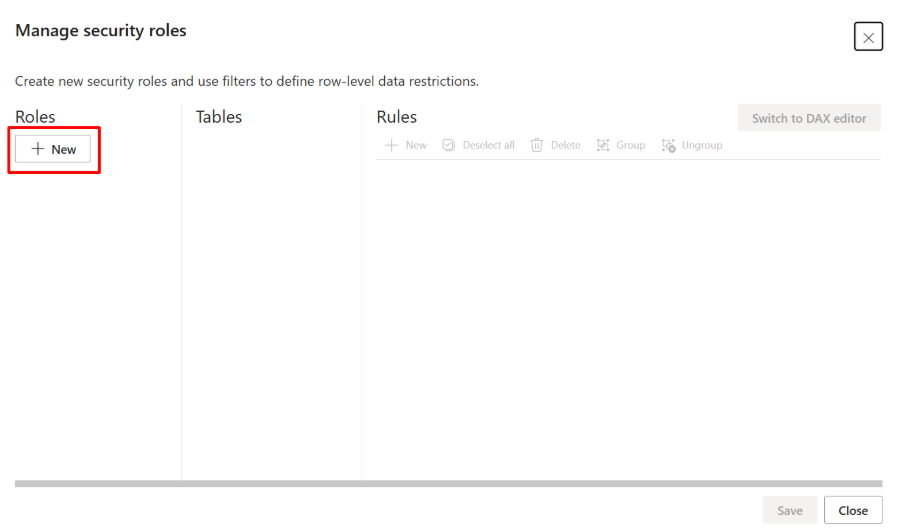
- Rename the role
- Example:
East_Region_Role
Use business-friendly names so admins understand the purpose later
- Example:
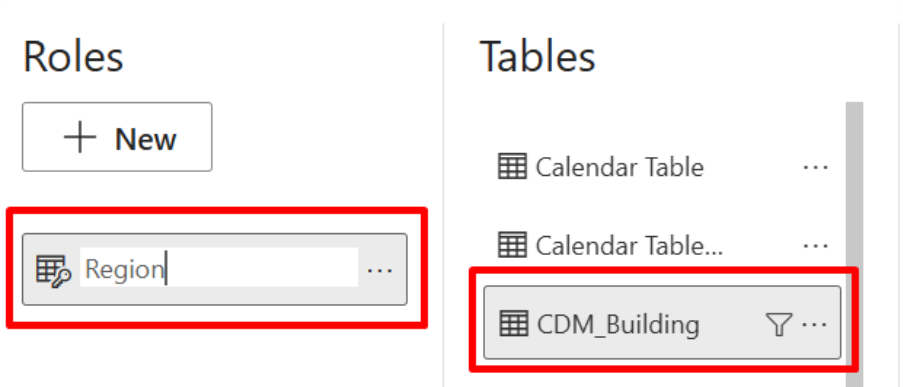
Apply the Static Filter
- In Manage roles, select the table where the security column exists
- In the filter box, write a boolean DAX expression
DimRegion[Region] = "East" - Only rows where
Region = "East"will be visible
How the Filter Works (Important Concept)
- Power BI filters the dimension table
- The filter flows through relationships
- Fact tables are automatically filtered
Validate the Role in Desktop
Never skip this step
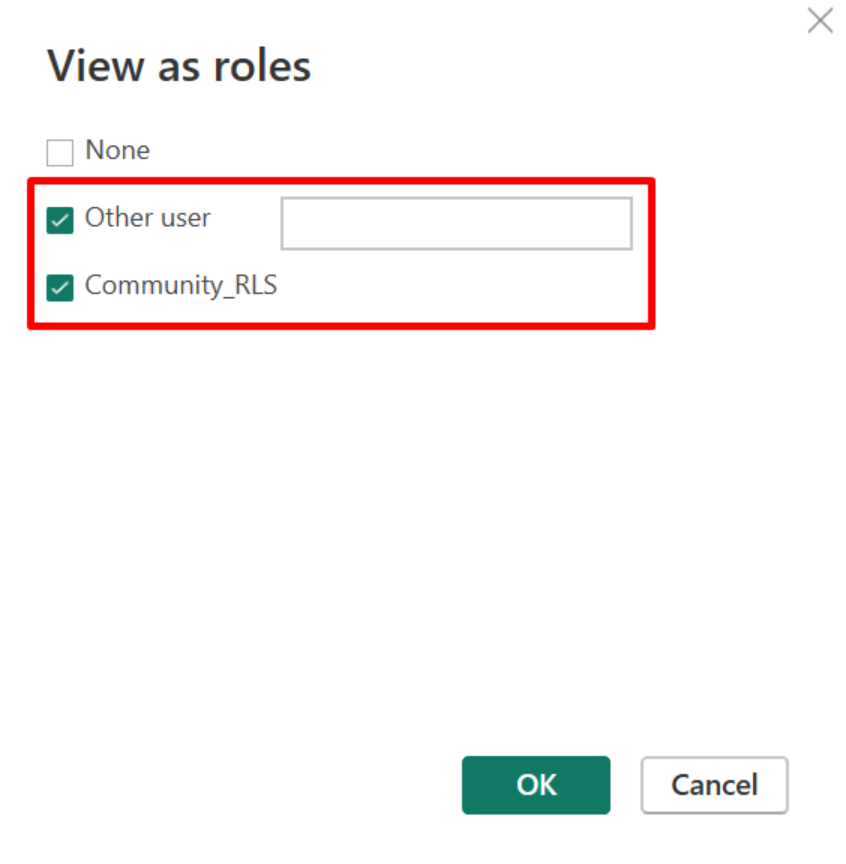
- Go to Modeling → View as

- Select the respective role
- Click OK
- Review visuals:
- Only the respective region data should appear
If Data Looks Wrong
- Check relationships
- Check column values (case sensitivity, extra spaces)
Save and Publish the Report
- Click Save
- Click Publish
- Publish to the required workspace
📌 Note:
RLS does not work locally after publishing — it is enforced in Power BI Service.
Assign Users to Roles in Power BI Service
- Open Power BI Service
- Navigate to the Workspace
- Locate the Semantic Model (Dataset)
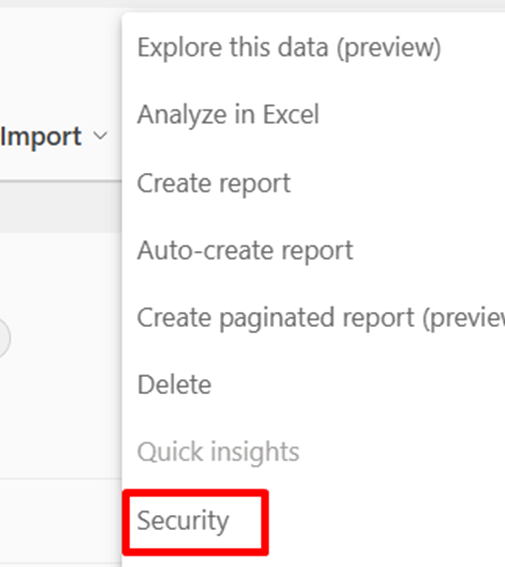
- Click More options (⋮) → Security
- Add users or Azure AD Groups to the role
- Click Save
✅ Static RLS is now active
When Static RLS Is a Good Choice
✅ Recommended When
- Small number of roles
- Stable access rules
- Limited number of users
❌ Not Recommended When
- Large organizations
- Frequent access changes
- Complex access logic
What Is Dynamic RLS?
Dynamic RLS restricts data based on the logged-in user.
- A single role supports multiple users
- Access is driven by a security mapping table
- Evaluated using DAX
📌 Notes:
UserEmailmust exactly match the Power BI login email- A user can have multiple rows for multiple regions or entities
Load the Security Table
The security table can be loaded from:
- Excel
- SQL Server / Database
- SharePoint list
- Power BI Dataflow
Ensure Data Quality
- No leading or trailing spaces
- Correct email casing
- No duplicate or invalid values
Create Relationships
- Go to Model view
- Create a relationship:
UserSecurity[Region] → DimRegion[Region]
Relationship Configuration
- Cardinality: Many-to-One
- Cross filter direction: Single
- Status: Active
📌 This relationship allows RLS filters to propagate to fact tables.
Create the Dynamic RLS Role
-
Go to Modeling → Manage roles
-
Click Create
-
Name the role (example:
Dynamic_Region_RLS) -
Select the
UserSecuritytable -
Add the following DAX filter:
UserSecurity[UserEmail] = USERPRINCIPALNAME()
✔ This ensures:
- Power BI captures the logged-in user
- Only rows belonging to that user remain visible
- Allowed values propagate through relationships to dimension and fact tables
How Dynamic RLS Works Internally
- User logs into Power BI Service
USERPRINCIPALNAME()returns the user's email- Power BI filters the
UserSecuritytable - Allowed dimension values (Region / BU / Property) are identified
- Related fact tables are automatically filtered
Test Dynamic RLS in Power BI Desktop
- Go to Modeling → View as
- Select the Dynamic RLS role
- Enter a test email address
- Click OK
- Validate the data shown in visuals
📌 Always test with:
- Valid user
- User with multiple access rows
- Invalid user (should see no data)
Publish the Report
- Save the report
- Publish to Power BI Service
- Open the target Workspace
Assign Users to the Dynamic RLS Role
- In Power BI Service, open the Semantic Model (Dataset)
- Select Security

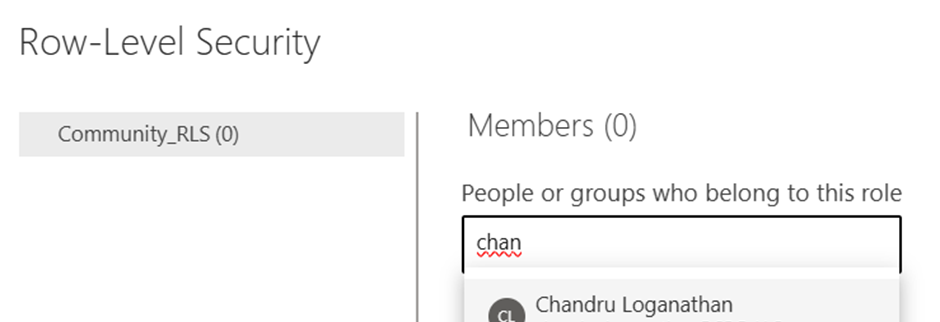
- Add:
- Individual users, or
- Azure AD Groups
- Click Save
📌 Every secured user must be assigned to this role.
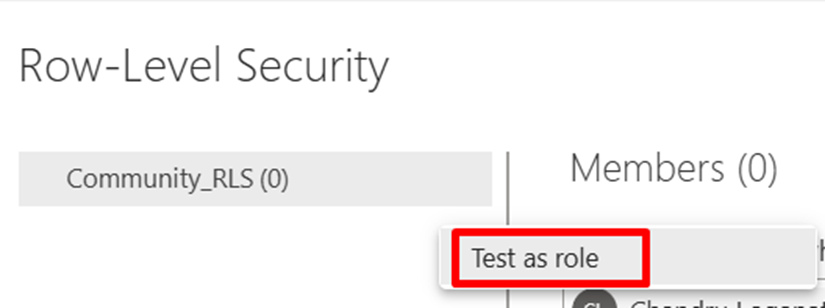
Validate Dynamic RLS in Power BI Service
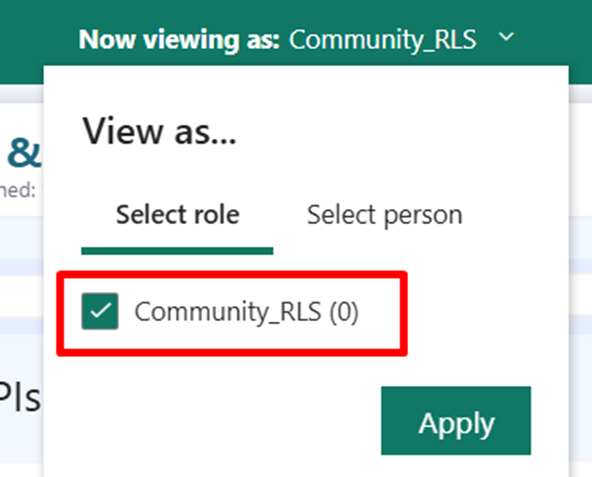
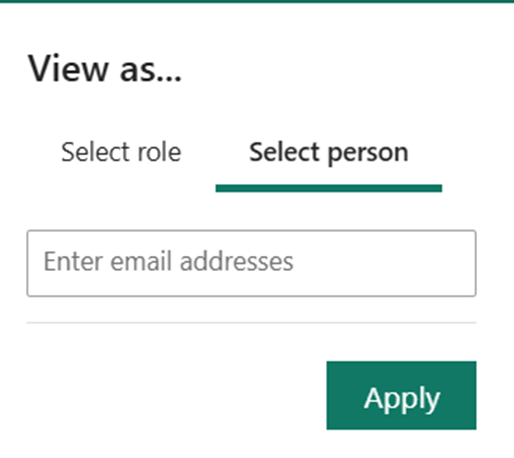
- Select View as
- Choose the RLS role
- Enter the user's email ID
- Validate data visibility matches expectations
Best Practices
- ✔ Apply RLS only on dimension tables
- ✔ Prefer Dynamic RLS for scalability
- ✔ Use Azure AD Groups instead of individual users
- ✔ Keep security logic simple and readable
- ✔ Maintain the security table centrally
- ✔ Avoid bi-directional relationships unless absolutely required
Common Issues & Fixes
User Sees No Data
- ✔ Email mismatch between Power BI login and security table
- ✔ Relationship missing or inactive
- ✔ User not assigned to the RLS role
User Sees All Data
- ✔ User is Workspace Admin
- ✔ Role not assigned in Power BI Service
What Is an AD Group?
An AD Group (Azure Active Directory / Microsoft Entra ID Group) is a centrally managed collection of users.
Uses in Power BI
- Assign RLS roles
- Control workspace access
- Manage app permissions
📌 Instead of adding users individually, add one AD Group.
Why AD Groups Are Important
Without AD Groups
- Manual user management
- High maintenance
- Risk of missing access updates
With AD Groups
- Centralized access control
- Scalable security
- Enterprise best practice
Example:
Add Finance_ReadOnly_Group to an RLS role → all finance users get access automatically.
Where Are AD Groups Created?
AD Groups are created in Microsoft Entra ID (Azure AD).
Create AD Group via Azure Portal
- Go to
portal.azure.com - Sign in with Admin credentials
- Navigate to Microsoft Entra ID → Groups
- Click New group
Benefits
- ✓ Centralized access management
- ✓ Reduced maintenance
- ✓ Enterprise-grade security
Security Validation Checklist
- ✓ Tested with valid user
- ✓ Tested with multi-access user
- ✓ Tested with no-access user
- ✓ Tested in Power BI Service
- ✓ Verified non-admin behavior
- ✓ AD Group assignment validated